Get Started With Seraph Help Desk
If you want to get started with Seraph but you’re not quite sure how to get going, this getting started tutorial is for you. We’ll teach you how to install Seraph Helpdesk and then give you the lowdown on setting up Seraph the way you want it, with your live data.
This guide is best if you follow it along with the demo version of Seraph, or your own installed version. If you don’t have the demo or installation package yet, just pop your email address into the box on the homepage, and we’ll send it across straight away.
Bookings are the bread and butter of Seraph, so it’s important to understand how they work.
Bookings are essentially things you want to track.
They can be repairs, or messages, or on-site jobs, or big projects or even just sales leads. Anything you want to track in Seraph is put in as a Booking.
This can be related to a customer or entered for internal use only.
Let’s create a support booking now to see what it looks like.
If you’ve already set up your demo Seraph, you can create a test booking right now.
Imagine you’ve just received a new email from a customer who has a problem with a product – they need some support, but it’s a difficult problem to solve and it’s going to need the help of a few people.
You’re first going to enter the customer into your database so his contact details are tracked, and then you are going to create a Support Booking
You do this by simply clicking Bookings, and then clicking on the plus button to add a customer.
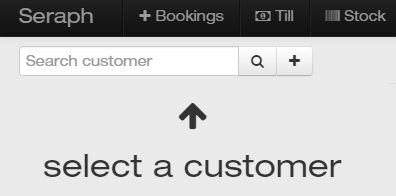
As soon as you have created the customer, you will be able to choose from the upper blue menu to select what exactly you want to the book. For now, let’s choose Support.
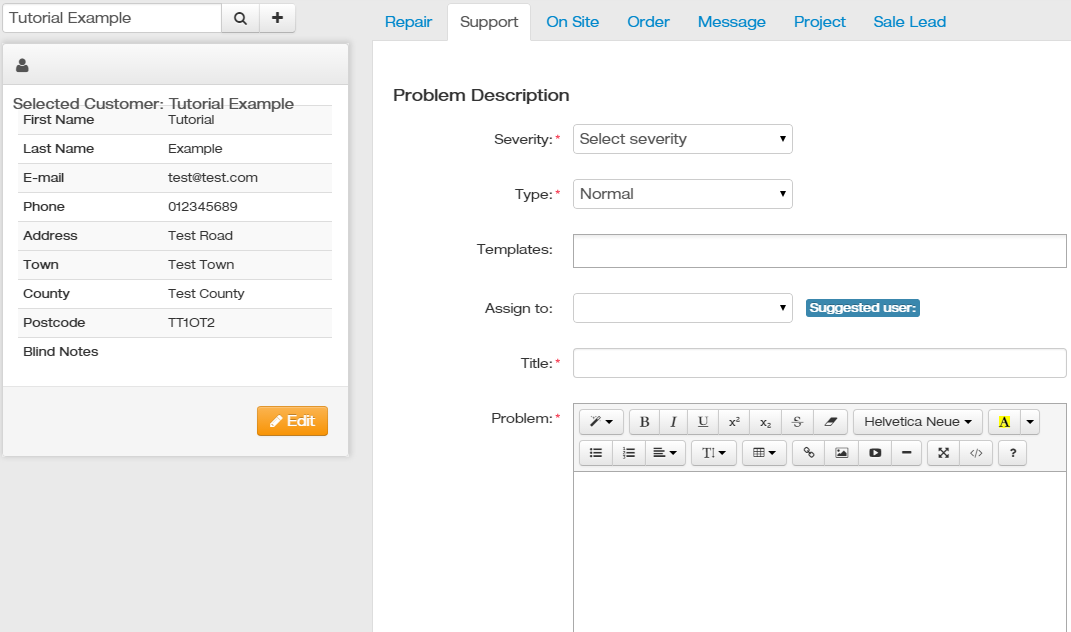
As you can see, you can select the urgency and type of problem as well as assigning the support job to a specific team member. This lets management or supervisors easily delegate to their team. This easy process remains almost entirely the same whether you are creating a Booking for a project, sales lead, stock order or simply passing on a message.
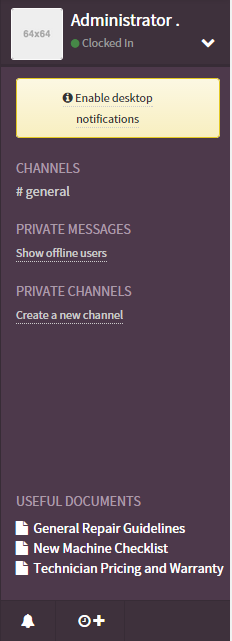
The Seraph sidebar is where the user profile and internal livechat system is placed. Here, users can Clock in and Clock out, request Holiday days, read useful documents placed there by managers, and talk to other users in the company using the livechat system.
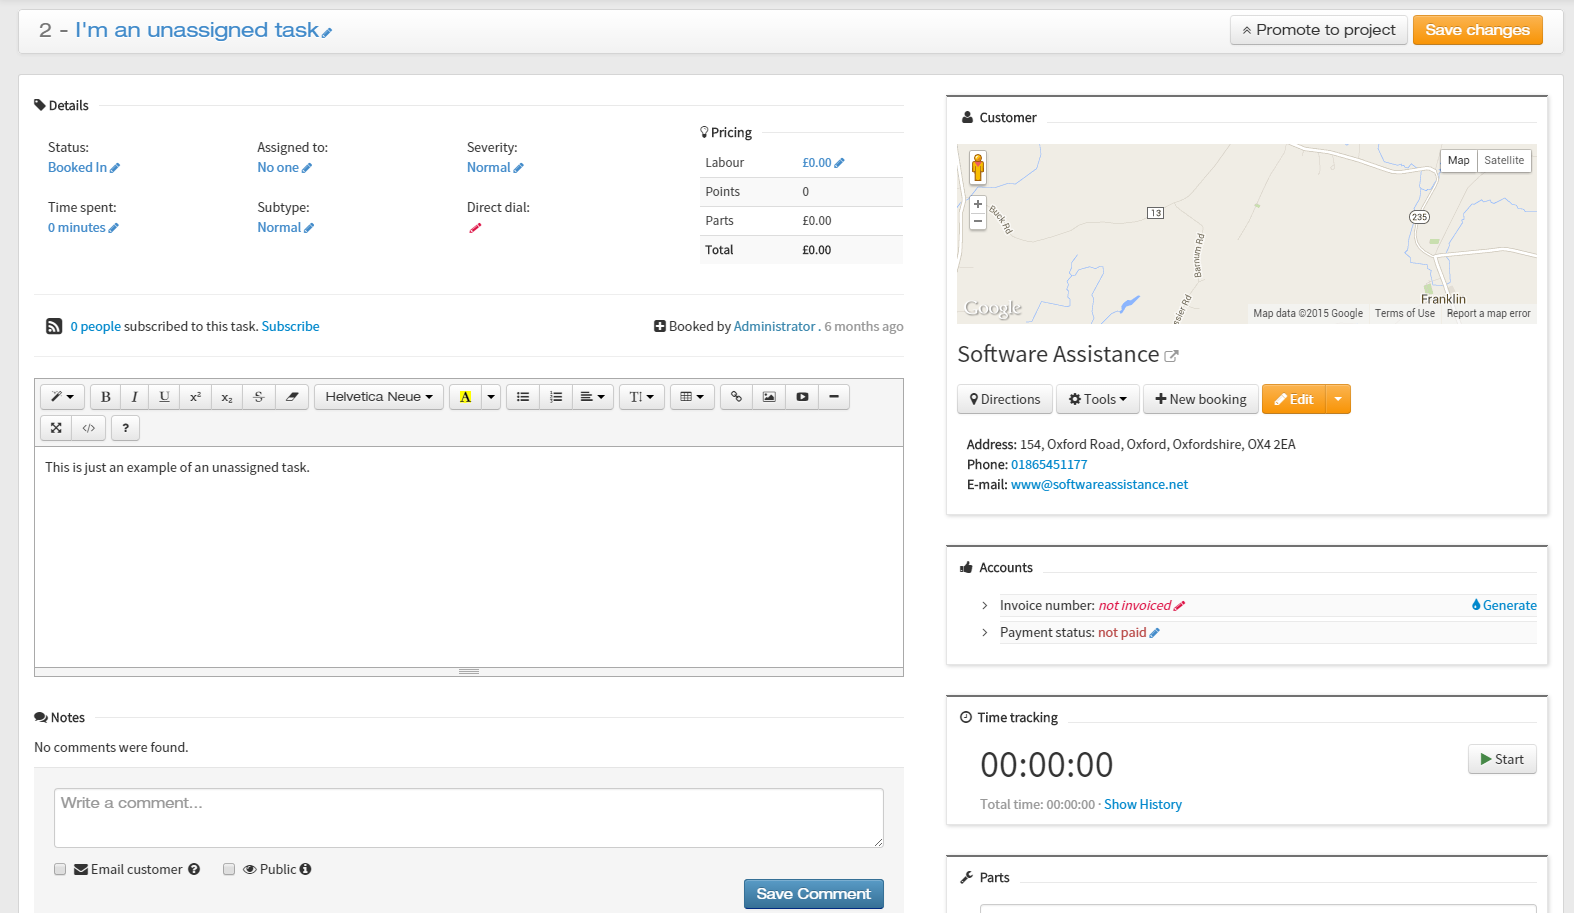
Each task has an intuitive interface that promotes collaboration. Why not hover your mouse over the below image to learn about Seraph’s different features in Task View?
Follow the instruction below and you should be running in no time:
- Install VirtualBox (you can skip this step if you already have VirtualBox installed) from https://www.virtualbox.org/wiki/Downloads. You will need to select the correct platform, for example if you are running Windows then download the Windows executable.
- Click the download button above to download the ZIP image of the software.
- Once downloaded, extract the archive anywhere on the disk.
- Now open the Seraph folder and double click on Seraph.vbox file. This should add it to the VirtualBox list of virtual machines. The Virtual Machine should now power on. The default login details are:
Username: root Password: seraph
- Once you login, type
ifconfig
and look for the ip address. Should be something like 192.168.0.5
- Open a web browser (ie. Firefox) on your computer and type in the IP address that you’ve got above (point 5). If everything went ok then you should be presented with a login page. The default username is admin and the password is seraph.
- That’s it. If you would like to find out how to configure more options then continue reading below.
Network
By default, the virtual machine is set up to use DHCP. If you want to setup a static IP address, then login to the virtual machine and type:
nano /etc/network/interfaces
Next you should see the following line
auto eth0
iface eth0 inet dhcp
Replace it with the following
auto eth0
iface eth0 inet static
address 192.168.0.10
netmask 255.255.255.0
gateway 192.168.0.1
Where 192.168.0.10 is your new IP address and 192.168.0.1 should be your gateway.
Press CTRL + X and then Y to save and exit the editor.
Configuration Folder
The application’s back-end is built using Laravel 4. All the configuration files can be found in /var/www/app/config folder. You can read more about Laravel here: http://laravel.com/docs/4.2
Kashflow
This step is optional.
Seraph Help Desk is configured to work with KashFlow out of the box, but it can work without it as well. If you want to enable KashFlow then edit the following file:
nano /var/www/app/config/kashflow.php
Make sure you enable the module and enter your credentials. Now when you access the Till, you should see a new option to sync your invoices with KashFlow, and every time you create a new Invoice or Transaction it will be automatically added to KashFlow.
Branding
To change the name of the application edit the following file:
nano /var/www/app/lang/en/branding.php
SMTP setup
By default, emails are being sent out using the local sendmail. If you prefer to use an external SMTP server for example, edit the file:
nano /var/www/app/config/mail.php
Change the driver to smtp and update the host, username and password.
More info can be found here: http://laravel.com/docs/4.2/mail
LDAP / Active Directory integration
To enable LDAP / AD integration, login as admin and go to the Admin page. Click on the LDAP module. Enter your credentials and test the configuration. Now you can logout and try to login with your LDAP / AD user.
Chat
The chat backend module is written in NodeJS and it uses Socket.io. It communicates with the databases using the REST API. You will need to manually start the server. This can be done with the following command:
cd /var/www/nodejs
node server.js
If you would like this to run in the background then you can run instead:
forever start server.js
There is a configuration file that you might want to edit:
nano /var/www/nodejs/config.json
This is pre-configured so that you can start the server straight away, however we recommend that you change your REST API secret string to a new value.
Automated email bookings
You can setup that the emails sent to a specific mailbox to be automatically booked in as support tickets in the system. Your mailbox should have IMAP enabled. To set this up, go to the Admin page, click on Email Settings.
You will need to enable the module as it is disabled by default. Hover your mouse over the button that says Disabled in the top right corner and click on it to enable the module.
Now click Add a new email address. Fill in your email details and click Create. Now all the unread emails in that mailbox will be automatically booked in to the system.
Microsoft Exchange calendar
You can hook the application to a Microsoft Exchange calendar. Go to the Admin page and click on Calendar. Enter your credentials and enable the module. Now on the dashboard you should see a new tab called Calendar that reads data from the Exchange account. Also when you book in an Onsite it will automatically add it to the calendar.
Note: for Office 365 the server address is outlook.office365.com
Seraph VS Others
| Seraph | Zendesk | NetHelpDesk | Service Cloud | |
|---|---|---|---|---|
| Web Based | Yes | Yes | Yes | Yes |
| Issue Tracking | Yes | Yes | Yes | Yes |
| Client Base | Yes | Yes | Yes | Yes |
| Credit Control | Yes | Yes | Yes | Yes |
| Business Calendar | Yes | Yes | Yes | Yes |
| Stock Control | Yes | Yes | Yes | Yes |
| Human Resources | Yes | Yes | Yes | Yes |
| Statistics | Yes | Yes | Yes | Yes |
| Customizable | Yes | Yes | Yes | Yes |
| Internal Chat | Yes | Yes | Yes | Yes |
| Open Source | Yes | Yes | Yes | Yes |
| Rest API | Yes | Yes | Yes | Yes |
| Mobile App | Yes | Yes | Yes | Yes |